
If you’re a pop-up camper owner, you know how important it is to properly maintain your camper to ensure it lasts for years to come. One of the most critical steps in this process is winterizing your pop-up camper. Winterizing your camper is essential to protect it from the harsh winter weather and prevent damage to the plumbing and other systems. In this article, we’ll show you how to winterize a pop-up camper in a few simple steps.
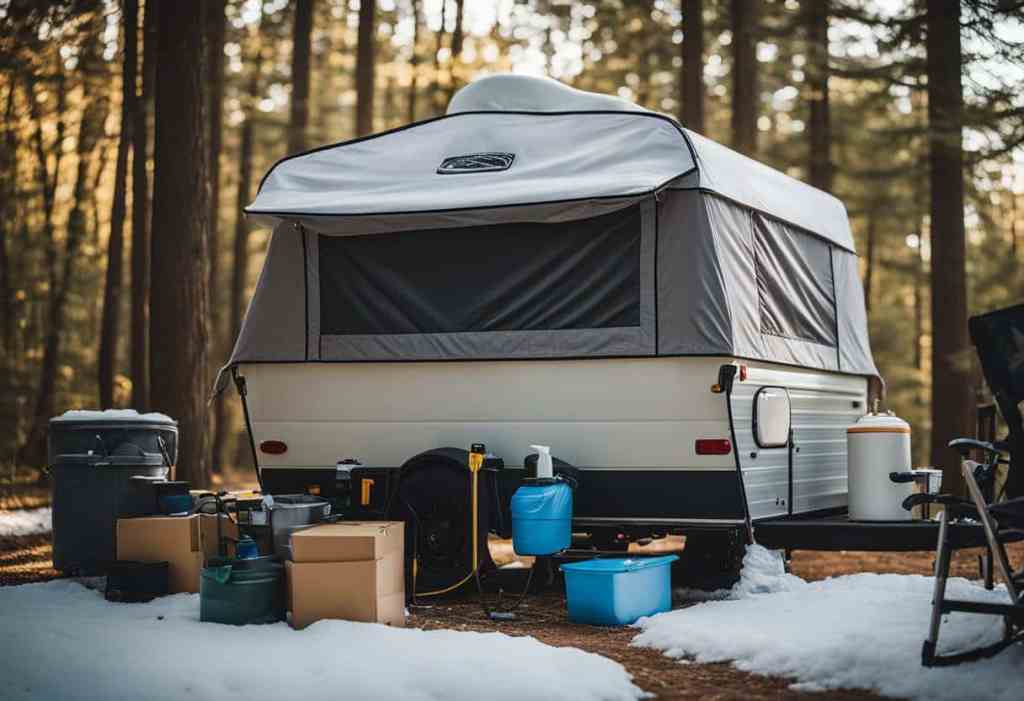
Before you start the winterization process, it’s important to gather the necessary supplies. You’ll need antifreeze, a water pump converter kit, a socket wrench, a screwdriver, and a bucket. Once you have these items, you can begin the process of winterizing your pop-up camper. Winterizing a pop-up camper involves draining all the water from the plumbing system, adding antifreeze, and preparing the camper for storage. In the following sections, we’ll go through each step in detail to ensure your camper is ready for the winter months.
Table of Contents
Overview of the Winterization Process
The below video is an excellent resource if you have the time. We highly recommend it!
Preparing the Exterior
Winterizing your pop-up camper’s exterior is essential to protect it from harsh winter conditions. This section covers everything you need to do to prepare the exterior of your camper for winter.
Inspecting and Sealing
Before winter sets in, inspect your camper for any cracks, gaps, or leaks. Check all doors, windows, vents, and skylights for any damage or wear and tear. Seal any cracks or gaps with caulk or weather stripping to prevent cold air from entering the camper.
Cleaning and Covering
Clean the exterior of your camper before winter sets in. Remove any mud or debris from the wheels and undercarriage. Wash the canvas and windows with a mild soap and water solution. Once the camper is clean and dry, cover it with a quality shrink wrap or tarp to protect it from snow and ice.
Securing the Camper
Secure your camper by parking it on a level surface and using wheel blocks to prevent it from rolling. Make sure the camper is stable and secure before you begin winterizing it.
Addressing Tires and Propane
Check the tires on your camper for proper inflation and wear. If the tires are worn, replace them before winter sets in. Inspect the propane tanks and lines for any damage or leaks. Make sure the propane tanks are turned off before you begin winterizing the camper.
Checking for Pests and Hazards
Check for any signs of pests or rodents inside the camper. Remove any food or flammable items that could attract them. Inspect the camper for any fire hazards, such as frayed wiring or damaged appliances.
Winterizing Appliances
Winterize your camper’s appliances, such as the refrigerator and generator, according to the manufacturer’s instructions. Insulate the appliances with blankets and skirting to protect them from the cold.
Protecting from Cold Weather

Finally, protect your camper from cold weather by insulating it with foam board or fiberglass insulation. Cover any exposed pipes with heat tape or foam insulation to prevent them from freezing. Follow this checklist to ensure you’ve covered everything you need to protect your pop-up camper from winter weather.
Winterizing the Plumbing System
When it comes to winterizing your pop-up camper, one of the most important steps is to winterize the plumbing system. This will help prevent any damage from freezing temperatures and ensure that your camper is ready to use again when the weather warms up. Here are some steps to follow:
Draining Water Systems
The first step in winterizing your plumbing system is to drain all of the water from your camper’s water lines. This includes both the city water and freshwater tanks. To do this, you’ll need to locate the drain valve or drain plug and open it up. You should also open up all of the faucets and turn on the hand pump to help remove as much water as possible.
Using Antifreeze
After you’ve drained all of the water from your camper’s plumbing system, it’s time to add antifreeze. You’ll want to use a non-toxic RV antifreeze that is safe for your plumbing system. Pour the antifreeze into the freshwater tank and turn on the hand pump to circulate it throughout the system. Be sure to also flush the toilet and run water through the shower to ensure that the antifreeze reaches all parts of the system.
Addressing Toilets and Showers
When winterizing your pop-up camper, it’s important to pay special attention to the toilet and shower. Make sure to flush the toilet and run water through the shower to ensure that all of the water is removed from these areas. You may also want to consider using a cassette toilet, which can be easily removed and emptied.
Inspecting Faucets and Sinks
Before you add antifreeze to your plumbing system, it’s a good idea to inspect all of the faucets and sinks in your camper. Look for any signs of leaks or water damage, and make sure that the p-trap is not clogged. If you do find any issues, it’s important to address them before you add antifreeze to your system.
Checking Water Heaters
Finally, be sure to check your camper’s water heater before you winterize your plumbing system. You’ll want to drain the water from the tank and bypass the water heater to prevent any damage from the antifreeze. Make sure to follow the manufacturer’s instructions for your specific water heater.
By following these steps, you can ensure that your pop-up camper’s plumbing system is properly winterized and protected from freezing temperatures.
Preparing the Interior
Before winterizing your pop-up camper, you need to clean and empty the interior. This will help prevent mold growth and rust, and ensure that your camper is ready to use next season. Here are some steps to follow:
Cleaning and Emptying the Interior
Start by removing all the food items and bottled water from your camper. This will prevent any mold growth or pests from getting into your camper. Then, clean the interior thoroughly. Vacuum the carpet and rugs, wipe down all surfaces with a damp cloth, and clean the windows. This will help remove any dirt or debris that could attract pests or cause mold growth.
Removing Food and Water
Make sure to remove all food items and bottled water from your camper. This will prevent any mold growth or pests from getting into your camper. If you have any canned goods or other non-perishable items, you can leave them in the camper. Make sure to check the expiration dates and dispose of anything that has expired.
Checking for Mold and Rust
Inspect the interior of your camper for any signs of mold growth or rust. If you find any, make sure to clean it thoroughly and dry it out completely. This will help prevent any further growth or damage.
Ventilating the Camper
Make sure to ventilate your camper by opening windows and using vent fans. This will help prevent mold growth and keep the air inside your camper fresh. If you have a generator, make sure to run it for a few minutes to circulate the air inside your camper.
Securing Appliances and Systems
Before winterizing your camper, make sure to secure all appliances and systems. Turn off the propane tank and disconnect any appliances that use propane. Drain the water system and make sure all appliances are turned off. This will help prevent any damage to your camper’s systems during the winter.
By following these steps, you can prepare the interior of your pop-up camper for winter storage. This will help prevent mold growth, rust, and other damage, and ensure that your camper is ready to use next season.
Final Checks and Maintenance
Before you store your pop-up camper for the winter, there are a few final checks and maintenance tasks you should perform to ensure it’s ready to go when spring arrives.
Inspecting and Lubricating Wheel Bearings
One of the most important maintenance tasks for your pop-up camper is to inspect and lubricate the wheel bearings. This will help prevent damage to the bearings and ensure a smooth ride when you hit the road again in the spring. You should also check the tire pressure and make sure the tires are properly inflated.
Checking and Replacing Batteries
Your pop-up camper’s battery is also an important component that needs attention before winter storage. Check the battery’s charge level and make sure it’s fully charged. If your battery is old or not holding a charge, it may be time to replace it.
Finalizing the Checklist
Before you put your pop-up camper into storage, make sure you’ve completed all the necessary winterization steps. Double-check your checklist to ensure you’ve drained all the water from the plumbing system, added antifreeze, and properly stored all items inside the camper.
Performing Necessary Repairs
If you notice any issues during the winterization process, now is the time to address them. Perform any necessary repairs to ensure your pop-up camper is in top shape when you’re ready to use it again.
Flushing Systems
Finally, it’s important to flush all the systems in your pop-up camper before storing it for the winter. This includes the fresh water tank, gray water tank, and black water tank. Flushing these systems will help prevent any buildup or damage during the winter months.
By performing these final checks and maintenance tasks, you can ensure your pop-up camper is properly winterized and ready to go when spring arrives.
Frequently Asked Questions
How can I keep mice out of my pop-up camper during winter?
Mice can easily find their way into your pop-up camper during winter if you don’t take the necessary precautions. One of the best ways to keep them out is to use mouse repellent. You can find many natural and chemical mouse repellents on the market that can help keep mice away. You can also seal any holes or cracks in your camper to prevent mice from entering.
How should I store my pop up camper during winter?
Storing your pop up camper during winter requires some preparation. First, you should clean and dry it thoroughly before storing it. You should also remove any food or perishables from the camper. Then, you should cover it with a breathable cover to protect it from the elements. Finally, you should store it in a dry and cool place, away from direct sunlight and moisture.
Can a pop up camper be left up all summer?
While it’s possible to leave your pop up camper up all summer, it’s not recommended. Leaving it up for extended periods can cause damage to the camper’s canvas, frame, and components. It’s best to take it down when not in use and store it properly to prolong its lifespan.
What is the best way to winterize a pop up camper with antifreeze?
Winterizing your pop up camper with antifreeze involves several steps. First, you should drain all the water from the system and remove any water filters. Then, you should bypass the water heater and drain it. Next, you should pump antifreeze through the water system until it comes out of all the faucets and fixtures. Finally, you should pour antifreeze down the drains to protect the holding tanks.
What are the steps to winterize a pop up camper for beginners?
Winterizing a pop up camper for beginners involves several steps. First, you should clean and empty the interior of the camper. Then, you should drain the water system and bypass the water heater. Next, you should pump antifreeze through the water system and flush the toilet. Finally, you should drain the holding tanks and remove the battery.
Should I cover my pop up camper during winter?
Covering your pop up camper during winter can help protect it from the elements and prolong its lifespan. However, it’s important to use a breathable cover to prevent moisture buildup and mold growth. You should also make sure to secure the cover properly to prevent it from blowing away in strong winds.
Growing up in the Pacific Northwest, we’ve always felt at home in the outdoors. We created Evergreen Adventures PNW to share our love of hiking, camping, and exploring, and to help others discover the best adventures this region has to offer. Along with trip guides and tips, we also enjoy diving into the science behind the landscapes—thanks to a background in Environmental Science—because understanding nature makes every adventure even more meaningful.